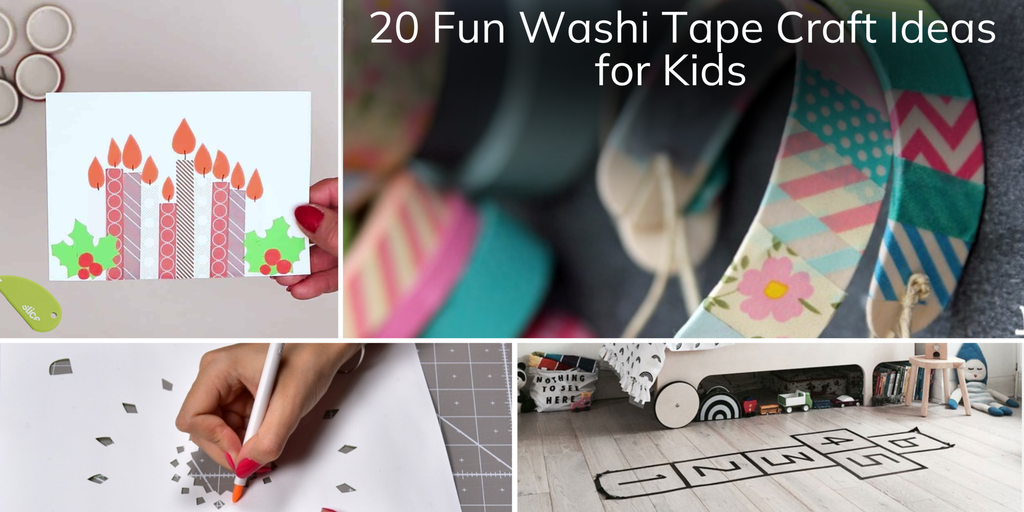
20 Washi Tape Craft Ideas Your Kids Will Love
Washi tape, a decorative tape made of traditional Japanese paper, is a popular artistic tool. Washi tape comes in fun colors and designs. Because of its simplicity, the crafting possibilities are practically endless.
Look no further than washi tape if you’re searching for new crafting ideas and ways to create art. Plenty of washi tape crafts are perfect for parents and kids to tackle. We’ve got 20 washi tape ideas for you right here.
What You Need to Start: DIY With Washi Tape
Besides having the obvious (washi tape), you’ll need a few essential tools to get started. Common implements when crafting with paper include scissors, tweezers, glue sticks, mats, and a high-quality craft knife or precision cutter.
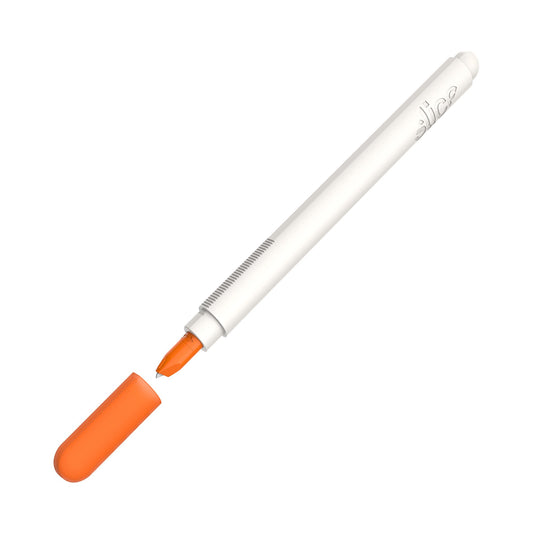
Slice® has a Precision Cutter perfect for maneuvering small spaces and tight corners, especially for artwork. In addition, this tool boasts a durable nylon handle and textured grip that gives you total control over your work, while the zirconium oxide blade lasts longer than metal and never rusts. You can take your washi tape creations to the next level with this invaluable asset.

20 Washi Tape Crafts for Kids
- Rainbow Craft
- Washi Tape and Popsicle Stick Frame
- Heart Art
- Customized Wooden Bracelets
- Wreath
- Paper Plate Tambourine
- Wall Art
- Birthday Card
- Nail Art
- Magnetic Bookmarks
- Tea Lights
- Decorate Coffee Mugs
- Washi Tape-Wrapped Pencils
- Hand Print Art
- Hopscotch
- Princess Crowns
- Washi Tape Wooden Birds
- Washi Tape Mural
- Washi Tape Car Track
- Washi Tape Chalkboard House
1. Rainbow Craft

Who doesn’t love crafting colorful works of art? Indulge your child’s love of colors by creating a washi tape rainbow. You’ll need the following:
- Scissors
- Blue cardstock paper
- White cardstock paper
- A glue stick
- A pencil
- A ruler
- And rainbow-colored washi tape
Step 1: Start by drawing 12 lines about half an inch apart on the blue cardstock paper. Then, your kid will know where to place the washi tape.
Step 2: Next, place said washi tape on each stripe in order of a rainbow’s colors. Follow that up by cutting out clouds from the white cardstock paper and gluing them to the bottom of the rainbow. Now, marvel at your vividly colorful creation.
2. Washi Tape and Popsicle Stick Frame

Create fun frames to showcase your cherished family memories with these adorable washi tape and popsicle stick picture frames. You’ll need the following:
- Washi tape
- Regular or jumbo popsicle sticks
- Glue
- And magnets to get started
Step 1: First, lay out your popsicle sticks and wrap the washi tape around them.
Step 2: Next, apply glue on two plain popsicle sticks and situate your decorated sticks on top. Then, glue a magnet to the back of your frame. Add decorations or other designs of your choice to your washi tape frame. Get creative!
3. Heart Art

Wear your heart on the outside with this delightful washi tape heart artwork. The supply list is short – you only need the following:
- Washi tape
- White paper hearts (this site suggests buying precut hearts from your local craft store)
- A single-hole punch
- And string
Step 1: Kick off the crafting by having your kids place washi tape strips over their hearts.
Step 2: Then, use the single-hole punch to create a hole in the top corner of your heart. Thread the string through it and tie the end. Be sure to display your loving crafts around the house.
4. Customized Wooden Bracelets

Create some washi tape wearable fashion with your kids during your next arts and crafts time. These customized wooden bracelets are sure to be a hit. In terms of supplies, you’ll need:
- Washi tape in various colors
- A glass of water for soaking
- A mug for molding
- Scissors
- A hemp beading cord
- Jumbo-sized popsicle sticks
- And an awl
Step 1: You’ll need to submerge your popsicle sticks in water for two days before starting your project. This ensures they’re pliable enough to mold. Then, after two days of soaking, carefully mold them into bracelet shapes. Place the bracelet-shaped popsicle sticks in your mug to mold them. Let them sit for one day. The bracelets will dry more quickly if your mug’s in the sun.
Step 2: Now, for the fun part – decorating. Add washi tape to your bracelets, use the awl to pierce two holes on either side, and slip the hemp cord through said holes. You’ve got yourself a stylish bracelet.
5. Wreath

With the holiday season in full swing, consider crafting this adorable washi tape wreath with your little one. You’ll need the following:
- A 12-inch wooden wreath
- Wooden clothespins (anywhere between 50 and 90)
- Hot glue
- Craft paint
- And washi tape
Step 1: Apply washi tape to your clothespins. Then, paint your wreath and let it dry. Once it’s dry, use hot glue to secure the clothespins around the wreath, as pictured above.
Step 2: Now, you can turn it into an advent calendar or hang it up as is. We like the simplicity of this festive display.
6. Paper Plate Tambourine

Add a little music to your little one’s life with this simple paper plate tambourine. You’ll need the following:
- Paper plates
- Corn or beans (¼ cup)
- Washi tape
- Markers, bells
- And glue dots
Step 1: You’ll start by folding the plate and sealing the edges with the glue dots. Leave a small opening to pour the corn/beans and bells inside. Seal the tambourine completely, then add washi tape to finish the job.
Step 2: Lastly, have your child decorate their new musical instrument with markers to give it that special touch. They’re officially ready to join a band.
7. Wall Art

Making wall art as a family can be a fun bonding experience that yields creative fruit. Incorporate washi tape into your wall art and notice how it elevates your creations. To start, you’ll need:
- A canvas
- Wooden letters
- Acrylic paint
- Washi tape
- A paintbrush
- Hot glue
- And Mod Podge
Step 1: First, apply acrylic paint on your canvas. Then, add washi tape to your wooden letters. Follow that up by coating the letters with Mod Podge, preventing the tape from peeling.
Step 2: Lastly, hot glue the letters to the canvas. Voilà!
8. Birthday Card

Have your kid show their love for their friends by creating homemade, from-the-heart birthday cards with washi tape. For this project, you’ll need the following:
- Scissors
- A glue stick
- A pencil
- A black marker
- Washi tape
- Construction paper (red, orange, green)
- And white card paper
Step 1: Cut the birthday candle flames from your orange paper. Then, cut out seven hollies from your green paper.
Step 2: Next, you’ll cut out holly berries from your red paper. Fold your white paper into a card. You’ll use your washi tape to create the birthday cake candles. Bust out the glue stick to glue your candle flames, hollies, and holly berries in their respective places, as shown above.
Step 3: Lastly, personalize your card with a message. And there you have it!
9. Nail Art

Now, you and your child can get creative with some fun washi tape nail art. For supplies, you’ll need the following:
- Transparent nail polish
- A pencil, precision scissors
- And washi tape at least the width of your thumb
Step 1: Apply a nail polish base or secure the washi tape on each bare fingernail to kick things off. Then, use your pencil to mark the shape of each nail over the tape, veering as closely to the skin’s edge as possible.
Step 2: Next, remove the washi tape and cut out the shape you made with your pencil. Follow that up by gluing each U-shaped washi tape to your nails. Cut off the excess tape. Apply a layer of clear polish to seal your look.
10. Magnetic Bookmarks

Encourage your kid’s love of reading by creating these adorable little magnetic bookmarks! Supplies-wise, all you’ll need is the following:
- Copy paper
- Washi tape
- And thin
- Sticky magnets
Step 1: Cut out your bookmarks from the copy paper. Then, apply a strip of your preferred washi tape design along the edge. Place a second piece of tape to cover the overlapping edges.
Step 2: Next, cut along the side of the tape, and fold it in half. You’ll cut out two half-inch magnets and stick them on each end of your bookmark. Lastly, you’ll fold your bookmark over wherever you are in your book, as pictured in the above photo.
Now, your child can read to their heart’s content.
11. Tea Lights

Here’s a simple, quick DIY craft that involves very few supplies. Have you ever thought about adding a bit of bold color to your tea lights? For this project, you’ll need:
- Tea lights
- Washi tape
Step 1: Wrap your preferred color/design of washi tape around your tea lights.
Step 2: Set them up in a clear bowl or by themselves, and display them for all to see.
12. Decorate Coffee Mugs

The best part of waking up is drinking from your washi tape mug! Spruce up your mornings with this super easy project that’ll make coffee the best part of your day. As far as supplies, you’ll need the following:
- Plain mug
- Washi tape
- Craft knife
- Decoupage glue or white craft glue (dishwasher safe)
Step 1: Start by decorating your mug with your preferred color/design of washi tape. Cut any excess tape hanging over the edges with your craft knife.
Step 2: Paint your mug with decoupage glue. Then, let it dry. Enjoy a steaming hot cup of joe from your freshly decorate mug.
13. Washi Tape-Wrapped Pencils

The new year’s just around the corner, so why not have your kids return to school with some stylish washi tape-wrapped pencils? It’s simple, fun, and takes very little time out of your day. Plus, your kiddos can design their pencils and get excited about learning. You’ll only need two things:
- Plain pencils
- Washi tape of different colors/designs
Step 1: Wrap your preferred washi tape color/design around your pencils. Let your kids get creative with this.
Voilà! Your child’s ready to grab the educational system by the horns.
14. Hand Print Art

There’s nothing sweeter than charting your child’s growth through art. You can create adorable hand-print art with washi tape, as shown above. All you need is
- Washi tape
- Cardstock
- Scissors
- Pencil
- Photo frame (optional)
Step 1: Trace your kid’s hand with a pencil onto the cardstock. Cut them out.
Step 2: Apply your preferred washi tape color/design to the back of your hand prints. Remove the excess tape with scissors.
Step 3: Frame your precious prints.
15. Hopscotch

Your child must stay active. Sometimes, they need a little activity to burn off some extra energy. That’s where indoor hopscotch comes into play. With the help of washi tape, you can create hopscotch without adding anything permanent to your floors. For this fun project, all you need is washi tape.
Then, simply lay out the squares and numbers as seen in the picture above. You might need a ruler to help keep your lines straight. After you’ve finished, let your kid go wild. Here’s hoping you don’t have downstairs neighbors!
16. Princess Crowns

Who doesn’t want to look like royalty? Now your child can give the royals a run for their money with these adorable princess crowns. For this project, you’ll need:
- Washi tape
- Toilet paper roll
- Scissors
- Elastic cord
Step 1: Cover the toilet paper roll in your preferred color/design of washi tape.
Step 2: Cut the toilet paper roll into a crown shape and add small holes at the bottom.
Step 3: Slip the elastic cord through the holes. Ensure the elastic fits your child and keeps the crown on their head securely.
Bow down before your princesses!
17. Washi Tape Wooden Birds

Add a taste of nature to your home decor with some vividly colorful washi tape wooden birds. Not only will your kids enjoy this project, but you’ll get a beautiful display out of it. Supplies-wise, here’s what you’ll need:
- Washi tape
- Wooden birds
- Beads (for the eyes)
- Ruler
- Scissors
- Cutting Mat
- Mod Podge for Paper
- Craft Knife
- Small foam brush
- Pencil
- Glue
Step 1: Add a few marks to ensure you apply the washi tape evenly. You can use your pencil and ruler for this.
Step 2: Apply your washi tape until the bird is covered, smoothing the tape as you go.
Step 3: Lay your bird with the washi tape side face down on your cutting mat. Cut the excess tape around the bird’s edges.
Step 4: Add a thin coat of Mod Podge to the washi tape.
Step 5: Once dry, glue on a bead for the bird’s eye.
18. Washi Tape Mural

There’s no better way to decorate a room than with a dazzling washi tape mural. It sparks the imagination and allows your child to show off their personality. For supplies, you’ll need:
- A projector
- Washi tape
- Craft knife
Step 1: Why the projector? Stick with us here. Firstly, you’ll project your chosen image onto the wall.
Step 2: Cover the picture with strips of washi tape.
Step 3: Bust out your craft knife and trim all excess tape outside the image’s outline, leaving only the washi-taped wall art in its wake.
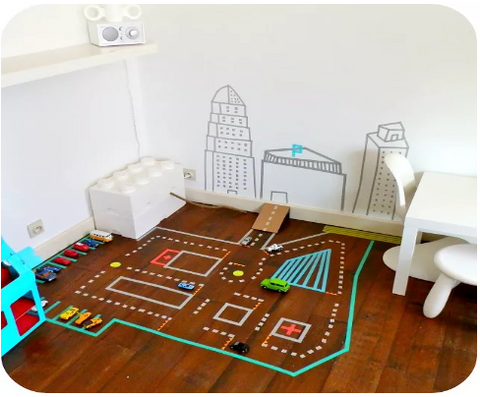
19. Washi Tape Car Track
Why purchase a pricey car track with breakable (and easy to lose) parts when you can construct one out of washi tape? It’s relatively inexpensive, for starters. Secondly, your kid will enjoy the construction process. You only need a few supplies:
- Washi tape
- Ruler
- Cardboard (optional)
Step 1: Construct the car track as pictured above. You can also add a cityscape on the wall, which is certainly optional. Use a ruler to keep your lines straight.
Step 2: Build a few tunnels with cardboard if you have it.
Step 3: Have your kid put their cars on the track and watch them have fun!
20. Washi Tape Chalkboard House

Here’s another simple project that can spawn hours of entertainment. This washi tape chalkboard house is very easy to construct, with few supplies needed to bring it to life. Here’s what you’ll need:
- Chalkboard contact paper
- Washi tape
- Chalk
Step 1: Cut out the shape of a house from your chalkboard contact paper. If your contact paper is magnetic or has an adhesive, it should stick to the wall.
Step 2: Use the washi tape to create the house’s outside edges and individual rooms.
Step 3: Let your child use chalk to decorate the rooms. Their imaginations are bound to go wild!
-
Cutter de precisión manual
Precio habitual $12.64 USDPrecio habitualPrecio unitario por