20 Simple Easy Paper Crafts for Kids

As far as crafting materials go, paper is one that doesn’t require any skill with which to work. Paper crafts are not only fun to make, but they’re incredibly easy paper crafts to create. They’re so easy to create that even toddlers can contribute to the paper craft fun. Anyone can dive into arts and crafts – no legitimate skill or extensive training is required. Simply find your inspiration and bring it to life.
Below, you’ll find a list of fun paper crafts the whole family can make. We’ve got plenty of super easy paper crafts for kids. Peruse this list to find your new favorite idea.
What You Need to Start: Tools for Paper Crafts
While there are countless tools on the market for various functions, only a handful of the classics remain in constant use. These easy paper crafts require the following tools: scissors, glue, and a craft knife.
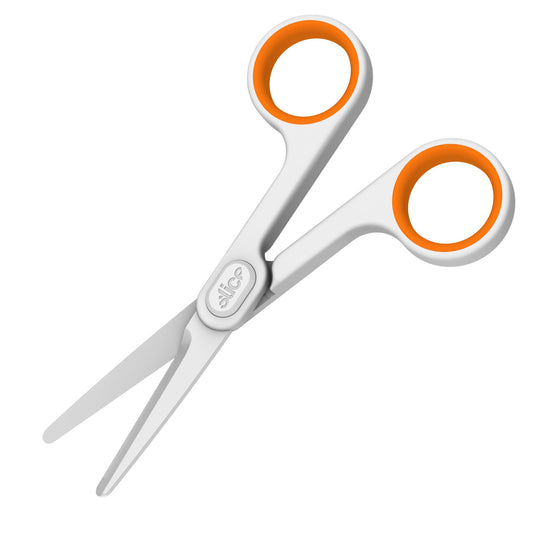
As far as crafting goes, you can’t go wrong with the Slice® Ceramic Scissors (Small). This implement is perfect for your kiddos. The blades are safe to the touch while they cut through almost anything seamlessly and effectively. Your kid’s safety is a top priority.

Types of Craft Papers to Use
Types of craft paper include tissue paper, cardstock, construction paper, origami, newsprint, and crepe paper. Our tools are designed to cut through virtually anything while keeping you safe. Consider investing in Slice tools for your next big art project.
Simple Easy Paper Crafts for Kids of All Ages
- Paper Handprint Peacock
- Paper Caterpillar Finger Puppet
- Newspaper Flower
- Paper Butterfly
- Shamrock Paper Wreath
- Paper Dragonfly
- Paper Snake
- Paper Chain Rainbow
- Creeper Paper Design
- Paper Fish
- Tissue Paper Sunflower
- Water Lily Art
- Paper Woven Basket
- Paper Jellyfish
- Paper Fruit Bookmark
- Tissue Paper Heart Card
- Handprint Turtle Card
- Paper Leaf Garland
- Paper Beach Collage
- Balloons Birthday Card
1. Paper Handprint Peacock

For this simple and fun design, you’ll need the following materials:
- Glue stick
- Pencil
- Scissors
- Cardstock paper
- Craft stick
- Wiggle eyes
After obtaining these materials,
Step 1: You’ll start by tracing an outline of your hands on the cardstock paper.
Step 2: Then, cut out the handprints (it’s best to have different-sized hands for this project). These prints will represent your peacock’s vibrant feathers.
Step 3: Next, you’ll cut out the peacock’s parts, including its beak, feet, crest, and body. You’ll need to glue the handprint cutouts together by layering them, with the smallest hand on the top and the largest on the bottom.
Step 4: Then, you’ll glue the eyes, feet, beak, and crest to your peacock’s body. Keep that glue stick handy as you glue the peacock to the handprint feathers and add the craft stick to its backside.
Now, your kids will have a colorful paper friend with which to play.
2. Paper Caterpillar Finger Puppet
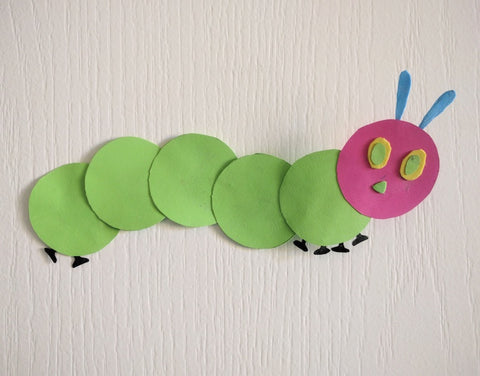
This project will keep your little ones occupied with some caterpillar playtime.
For this craft, you’ll need:
- A glue stick
- Scissors
- Cardstock paper (green, pink, black, blue, and yellow)
- A pencil
Step 1: Firstly, cut five circles from the green paper and one from the pink paper.
Step 2: Then, you’ll draw and cut shapes for the eyes, ears, mouth, and legs. Follow that up by gluing the green circles together to create the caterpillar’s body and make the pink circle the head.
Step 3: Next, glue the features to the caterpillar’s head. Lastly, you’ll attach the legs to the body. Let the caterpillar puppet show commence!
3. Newspaper Flower

Flowers can spruce up any setting, whether they’re real or not. If you and your little one enjoy creating fun flower displays, why not use newspaper as a material? It’s a great way to reuse materials and get creative with your arts and crafts projects. For this craft, you’ll need the following:
- Cardstock paper
- Newspaper
- Glue stick
- Paper straw
- Stapler
- Scissors
- Decorative paper edge scissors
Step 1: You’ll start by cutting six strips from the newspaper (around 6 inches each) and trimming the ends to make them circular. Staple all the strips together, fanning out the strips in a circle to imitate the appearance of flower petals.
Step 2: Then, cut a circle out of the cardstock paper using decorative paper edge scissors. Glue that circle in the middle of the newspaper petals and glue the straw on the backside of your flower.
4. Paper Butterfly
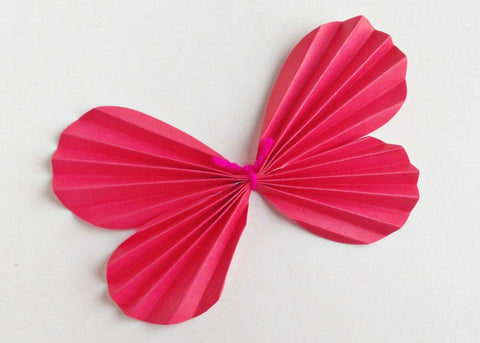
Who doesn’t love a gorgeous and easy paper butterfly craft? These simple and fun paper butterflies are perfect for brightening any space and bringing thoughts of warmer weather. This design requires the following:
- Scissors
- Glue
- A template
- Yarn
- Colored craft paper
Step 1: You’ll need to print out the template on this page before diving in. You’ll get upper and lower wings.
Step 2: Then, accordion fold the wings. Apply a glue drop to the middle of the lower wings.
Step 3: Attach both sets of wings with the glue as the bonding agent. Tie some yarn around the middle section and use the ends as antennas. Spread the folds of the wings out to make them look full.
5. Shamrock Paper Wreath

The luck of the Irish is on your side. These shamrock paper wreaths are perfect for not just St. Paddy’s Day but a year-round household staple of good luck. You’ll need the following:
- A pencil,
- Scissors,
- Cardstock,
- Glue,
- Craft paper with different shades of green,
- And a template (which you can download here).
Step 1: Outline and cut out the shamrock wreath pattern. Then, cut the green craft paper into 1-inch squares. Crumple that paper into small balls.
Step 2: Glue the paper balls to the base of the wreath. Once you’ve finished covering the shamrock wreath with varied shades of green paper, you’re ready to display your creation.
6. Paper Dragonfly

Ah, dragonflies – one of nature’s most wondrous creatures. You don’t have to wait until summer to spot a dragonfly. Now, you can create your own. As for supplies, you’ll need the following:
- Wiggle eyes,
- Paper straws
- Scissors
- A glue stick
- Colored paper
- White paper
- A hole puncher
Step 1: You can download a free dragonfly design template here. Proceed by cutting out the various pieces in the template, such as the wings and body.
Step 2: Fold the dragonfly body like an accordion. While folded in this manner, punch a hole in the center and run a straw through the body. Glue on the wings. As for the excess paper hanging off the accordion-ed body, fold that over to make the dragonfly’s head, as shown above. Glue on the wiggle eyes.
Watch while your child squeezes every last drop of playtime out of their new creation.
7. Paper Snake
Another easy paper craft is this real-life snakes that might scare you, but these beauties won’t. For this project, you’ll need the following:
- Construction paper in various colors,
- Markers
- Glue
- Scissors
- And small wiggle eyes
Step 1: Firstly, you’ll cut a strip of the paper length-wise.
Step 2: Then, make one end pointy while the other gets a flat side. That’ll serve as the head of your snake. Glue the wiggle eyes and use the markers to add details on the snake’s body.
You’ll also cut out the tongue on red paper and glue it to the head.
Step 3: Lastly, wrap your snake around a marker and hold it in place. Unwrap it, and observe how your snake looks coiled and ready to strike.
8. Paper Chain Rainbow

Remember when you made paper chains as a child? Now, you can pass that on to your kid with this incredibly simple activity. You’ll need the following:
- Scissors
- Paper of varied colors (preferably the colors of the rainbow)
- And tape
Step 1: You’ll start by cutting slivers of paper from each color and taping them together in circles.
Step 2: Then, you’ll connect circles of other colors to the first link, and so forth. Refer to the picture above to see the finished product.
9. Creeper Paper Design

This design is perfect if your kid is a Minecraft fan! They can create a creeper of their own with this simple and fun project. You’ll need the following:
- A creeper template
- White and colored cardstock
- A glue stick
- And scissors
Step 1: Then, cut out your template and cut some different colored cardstock.
Step 2: Watch your child design their creeper by gluing pieces of cardstock onto the template.
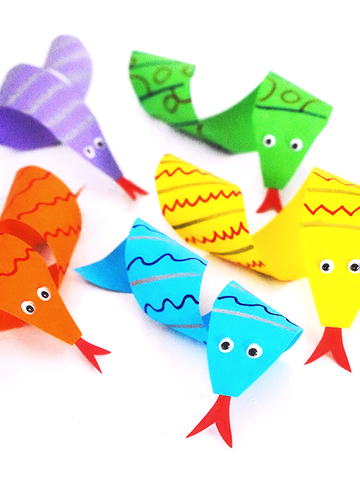
10. Paper Fish

Your kiddos can get creative by crafting some underwater friends. This easy paper craft will undoubtedly keep them occupied. All you need is the following:
- Wiggle eyes
- Scissors
- Glue
- And colorful paper
Step 1: Firstly, you fold a section of the paper into a triangle.
Step 2: Then, you cut multiple slits into said triangle. Unfold the paper; fold each slit inward so that the end touches the center of the paper. Glue them in place.
Step 3: Next, glue a piece of circular paper over the front to create the fish’s head. Add fish lips. Lastly, glue the wiggle eye on your new aquatic pal’s head.
11. Tissue Paper Sunflower

Have your kids create a beautiful piece of sunflower art to brighten your home. Not only is it fun for them, but you get a decorative statement. To start with, you’ll need the following:
- A glue stick
- Scissors
- Cardstock
- A pencil
- And tissue paper (yellow, brown, green, blue, and black)
Step 1: Sketch your template of a sunflower.
Step 2: Then, scrunch up small pieces of colored tissue paper and glue them in the appropriate places, as pictured above.
12. Water Lily Art

Have you ever wanted to recreate Claude Monet’s “Water Lily” series? Now, you can. This fun craft project is an opportunity to teach your young one about a famous artist while creating something beautiful. For supplies, you’ll need the following:
- Cardstock (white, green, pink, purple, and blue)
- A glue stick
- And cupcake liners
Step 1: Have your kid tear off strips of blue and green to create the watery background.
Step 2: Then, glue the cupcake liners to the water and add crumpled pink paper to the center of each liner. These are your water lilies.
13. Paper Woven Basket

Does your child need something to help them carry their stuff while they wreak havoc in your house? Look no further than this fun activity. Your kid can create a woven basket composed of paper. You’ll need the following:
- Scissors
- A stapler
- A glue stick
- And construction paper in various colors
Step 1: Then, you’ll fold some paper the “hamburger way” and make small marks about one inch apart on said paper.
Step 2: Next, fold the paper the “hotdog way” and cut strips that are ¾ of an inch thick. Cut strips all the way through. Utilize the weaving technique for all four sides until you have a box. Don’t forget to put that glue to good use.
14. Paper Jellyfish

Who knew jellyfish could be so cute? With this easy and fun paper craft, your child can craft the cutest creatures from under the sea. You’ll need the following:
- Black and blue markers
- Scissors
- Glue
- Small wooden clothespins
- Wiggle eyes
- Colored paper
- Light blue cardstock
- And a jellyfish template
Step 1: Start by cutting out the patterns in the template and tracing them onto the paper. You’ll need five tentacles. Glue the tentacles to the body and the jellyfish to the blue cardstock.
Step 2: Then, you’ll make tentacle bows by taking paper strips and gluing their ends together to create circles. Next, apply glue to the center of each circle and press the sides to craft a bow. Step 3: Use the clothespins to ensure the glue secures the bow. Glue the bows to the tentacles – around three per tentacle.
Add the wiggle eyes and draw on a smile. Boom! You’re good to go.
15. Paper Fruit Bookmark

Here’s a fun project that also encourages your child’s interest in reading. You can make adorable fruit bookmarks! All you’ll need the following:
- Scissors
- Craft glue
- A pencil
- And colored craft paper
Step 1: Download and print out this fruit design template for a bit of help. Then, cut out the designs.
Step 2: Next, you’ll trace the patterns onto your craft paper and cut them out, gluing on seeds and adding details as shown in the above photo.
16. Tissue Paper Heart Card

Here’s a fun card design that’s so quick and easy you’ll wonder if any time passed while you crafted it. To make this sweet tissue paper heart card, you’ll need the following supplies:
- Cardstock
- Scissors
- Glue
- A pencil
- And printed tissue paper
Step 1: First thing’s first, you’ll fold the cardstock in half like a card. Trace the outline of a heart on your preferred side. Then, cut square pieces of tissue paper (x1 in. should do the trick).
Step 2: Here’s where your pencil comes into play. You’ll mold a piece of tissue paper over the flat end of the pencil. Apply a bit of glue on that flat end and carefully place the tissue paper in the heart. Repeat until every nook and cranny is covered in tissue paper.
Step 3: Lastly, add any touching personal messages inside (bonus points if it comes from your child).
17. Handprint Turtle Card

If there’s a list called “Top 5 Cutest Animals of All Time,” turtles would fall in at number five. While you might put your foot down regarding your kid owning a real, live turtle, at least they can craft a less sentient version with this adorable turtle card. For materials, you’ll need the following:
- Cardstock
- Pom poms
- Scissors
- Glue
- And an eye sticker
Step 1: Firstly, you’ll fold the green cardstock and have your child trace their hand on one side. Cut out the handprint while the card is still folded.
Step 2: Then, glue pom poms on the top part (or bottom of the hand, technically) to make the turtle’s shell.
Step 3: Next, draw and cut out the turtle’s head and glue it near the top toward the back, as shown above. Slap on the eye sticker and use a marker to create some details.
18. Paper Leaf Garland

Another easy paper craft ideas? This beautiful leaf garland is perfect for bringing the fall season into your home or if you wish it were autumn year-round. You and your child will need the following:
- Cardstock
- Scissors
- Twine
- A hole puncher
- And a glitter gel pen
Step 1: You can also download a free leaf design template here. Start out by drawing and cutting out leaf shapes on various colors of cardstock. Punch two holes on the base of each leaf.
Step 2: Bust out your glitter gel pen to draw details on the leaves. Lastly, thread the twine through the holes to create a garland halo shape. And that’s that!
19. Paper Beach Collage

With the colder months no longer on the horizon, you and your family might be pining for warm sunshine and shimmering waves. Now, you can bring the beach to you and pretend you’re living in a tropical paradise. This project requires the following:
- Various colors of cardstock
- A paper roll tube
- Scissors
- A glue stick
- Colored pencils
- And a paper doily
Step 1: Firstly, create palm tree leaves and bushes from green cardstock, and use the empty paper roll tube to craft the trunk of your palm tree.
Step 2: Cut out the sun, clouds, and shore from other cardstock colors. Fold the paper doily to make it look like the top of an umbrella, as pictured above. Once glued to your work, you can use a colored pencil to sketch the pole. You can create other beach mainstays such as a starfish, towel, and dune.
Step 3: Finally, glue all the pieces together on blue cardstock. Your little one will have a blast piecing together this picture.
20. Balloons Birthday Card

Nothing says “heartfelt” more than a homemade birthday card. Your kid can create unique cards for their friends with this easy and fun project. For this, you’ll need the following:
- Cardstock paper
- Pom poms
- A black marker
- Glue
- And yarn
Step 1: Firstly, you’ll fold the cardstock in half like a card. Secondly, you’ll glue the pom poms on the front of the card in various positions. Then, you’ll draw “balloon strings” using the black marker.
Step 2: Lastly, tie the string of yarn in a bow and glue it where the balloon strings converge, as shown above. Your card is complete! Heartwarming messages within not included.
-
Small Scissors
Regular price $29.99 USDRegular priceUnit price per